Getting Started with Decluttering your Home

Decluttering is a great way to clear up your home and prepare for something big, whether that is the arrival of a new child in the family or just the start of a new year. Whatever the event, having a clutter-free and easy-to-navigate home can make a huge difference, both physically and mentally.

Not only does decluttering really help you stay on top of your current goals, but it can be enough to keep your mental health stable when you are stressing about so many other things. Even a little bit of tidying a day can go a long, long way.

Know What You’re Keeping

If you are making major changes to your living situation, then it is a good idea to understand what you will definitely be keeping. This is especially important for people who might move house, change around rooms, or need to make an extra bedroom in their home.

Using a dumpster rental in the city of Boyertown usually means you have a significant project on your hands.

Even if you are just decluttering for decluttering’s sake, though, it is important to know what you will be keeping. If you can set aside items that you would never get rid of, then it becomes much easier to plan around the things that you might get rid of, rather than focusing on them all at once.

This can also help for situations where you are planning new room layouts or moving all of your furniture around. Having a definite understanding of how much space it all takes up can be a major boon and will often help you arrange rooms far more efficiently.

Keep Only What You Need

It is easy to get caught up on small things when decluttering, but it is important to consider which things you actually want and need first. While sentimental value is a valid reason to keep something, you do not want to obsess over it “just because.”

It is a good idea to consider how much you have used some of your possessions, as well as how much you will be able to use them in the future. An old cycling helmet might have some sentimental value, but there is no point in keeping it if you do not plan to go cycling again.

If you are decluttering before a move, then this is even more important. Not only do these items take up more room in the moving vehicle and your home, but you would need to find a new place to store them. Taking too many unnecessary things can slow down the entire moving process for you.

Clear Space for New Things

While it can be tempting to try and clear out a nice, empty space, you should always remember that you will eventually be buying new things to fill the gaps. The ideal way to declutter is to think about how your home will look after buying a few more things – leave some space spare just in case.

For example, clearing out just enough items to make a room feel open is great, but then it only takes one or two more purchases to clutter it up again. Having an extra buffer of space is always a good idea and can really help you compensate for impulsive purchases or gifts from friends.

Always do more than the bare minimum, and do not get caught up with trying to make big, sweeping changes to your home’s layout. Simply get rid of anything that you no longer need, and try to clear enough space so that you can be comfortable in each room without feeling like it is cramped.

Consider Safety

It is important to make sure that you are decluttering your home in a safe way. For example, moving something from the floor to a high shelf Is a great way to avoid taking up excess floor space, but an item that is too heavy could pose a risk if somebody needs to get it back down.

This is especially true if you are decluttering to prepare for a baby or pet. Safety should be a major concern, so be sure to babyproof your home and avoid keeping any dangerous items within easy reach of them. Declutter from their perspective, not your own.

Pets are a similar issue. Never underestimate how high they might jump to reach something or what they might climb to get to it. Cats are especially likely to climb furniture, but even small dogs can sometimes scale things they should not to try and find snacks that are not safe for them to eat.

Focus on Comfort

You should always put comfort before anything else (except safety, of course) when decluttering your home. If you can’t be comfortable in your own house, then it influences your mental and physical health, making it harder to keep focused on actually getting things done in your life.

For example, if you work at home from an office in your bedroom, then you might want to arrange distinct spaces so that you are not distracted while working. Comfort does not just mean physical comfort, but your ability to live your life normally while in your own home.

Different people prefer different things, so in homes with multiple people, it is important to find compromises. What you see as a perfectly tidy room could be incredibly distracting to another person, especially if they have to share the exact same spaces with you.

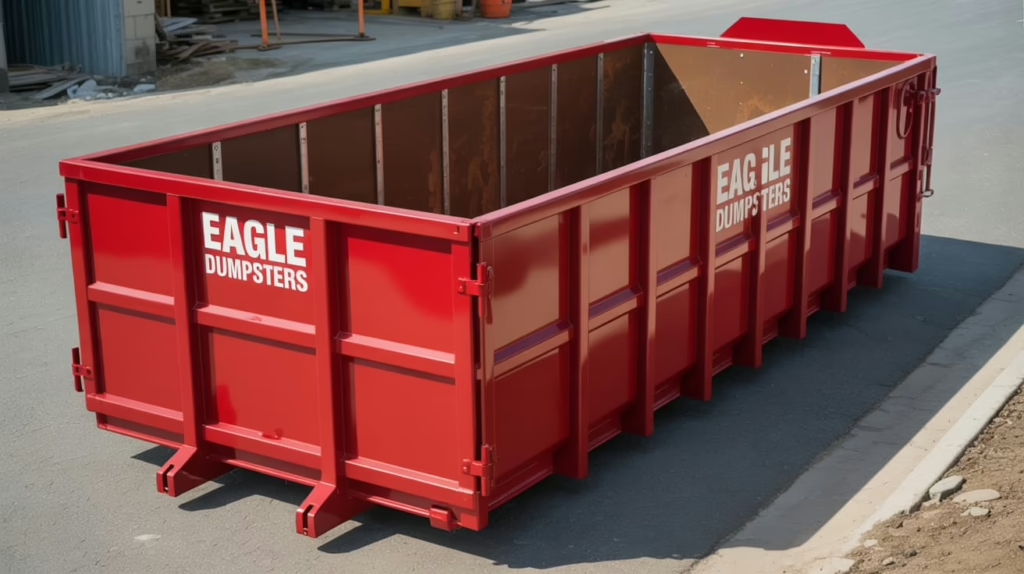
Whatever you do, it is important to dispose of things well. We at Eagle Dumpster Rental can help you move large amounts of debris, scrap furniture, or countless other pieces of clutter with ease, all without having to leave the comfort of your own property.

© Copyright 2024. All Right Reserved.

Recycling Glass at Home

Glass can be a tricky material to handle. Many people were brought up with the assumption that glass could never be recycled, and it is very easy to get confused over when (and how) you are supposed to recycle it. Do you have to wash it? Does it need to be a certain thickness?

Working with glass might seem annoying at first, but recycling your glass is a core part of efficient living and saving our natural resources. The important part is understanding the specifics behind glass recycling, especially when you have multiple types of glass to recycle.

Eagle Dumpster Rental provides superior services for dumpster rental in Bristol, Pa.

Can you recycle glass?

In many cases, glass is near-infinitely recyclable. Many types of glass can easily be recycled and used over and over again since the material hardly ever degrades over time. By recycling used glass bottles, you are effectively saving the natural resources that would be used up, creating more bottles.

Glass never fully wears out, meaning that it can almost always be re-used. Since it is such a useful material, there is always a demand for more, whether that is for holding drinks or being used in high-profile research labs.

Can you recycle all kinds of glass?

While glass itself is recyclable, that does not mean that all types are. A lot of glass is used in ways that will permanently change it, whether that is the additions of new materials and glass treatments or due to chemical contamination.

Some of the most notable types of glass that you can’t usually recycle include:

  • Lightbulbs, unless otherwise specified
  • Heat-resistant glass
  • Ceramics
  • Crystals
  • Automotive glass (such as windshields)
  • Mirrors
  • Some window panes

You can check with your local government or recycling centers to check which glass types are allowed and which are not. For example, there may be specific places where you have to recycle certain colors of glass or other similar restrictions.

What about broken glass?

Broken glass usually is not a problem, as long as it is allowed at the site that you are taking your recycling to. Some locations may even prefer broken glass, meaning that it is an easy way to get rid of broken bottles or other types of glass that you can’t re-use.

Remember to pick up the broken pieces carefully so that you do not cut yourself. You may also want to keep them in a reliable bag or box during transport, just in case more pieces break off the glass bottles or containers.

How to prepare glass

While you can recycle almost all kinds of normal glass, you still need to prepare it for the recycling process itself. This usually means that you simply have to rinse them out – especially if they were originally food or drink containers – but there are sometimes other important steps too.

For example, you should remove the labels from as many glass containers as possible. These can often be recycled separately, and keeping them on the glass only means that they will burn and let out CO2 during the melting process. It is much more efficient to simply tear them off.

Get rid of any lids, caps, or other non-glass components and pieces, too. You want your recycled glass to be all glass, not a mixture of materials.

How to recycle your glass

There are multiple ways to handle your glass before sending it off to get recycled, but the best option depends on where you are located and how much glass you need to deal with. Your local area may also have its own limits on what it can process.

Curbside Pickup

Some communities have a curbside option for glass collection, meaning that you can simply leave the glass out to be recycled. This is not always an available option, but it can be the most convenient way to recycle a lot of your glass all at once and does not take any real effort from you.

Curbside options are quite rare, so you should always check that your local community actually supports them. There may also be heavier restrictions on which kinds of glass you can recycle or even how much you can leave out at a single time.

Recycling Sites

You generally have the option of taking glass to your usual recycling collection points, although you should still check ahead to make sure that they accept glass. While this requires you to make the trip yourself, it is a good excuse to get rid of a lot of recyclable materials all at once.

These recycling trips do not usually take very long, but you should still load as much of your glass into your car as possible. The less glass you have left lying around, the less clutter will be left in your home – especially if that glass is broken glass.

Recycling Dumpster

Sometimes a dumpster rental (like an Eagle Dumpster Rental offering) can be the best way to handle a lot of recyclable materials all at once. Not all dumpsters are meant purely for non-recyclable materials, and you can always specify that a certain dumpster rental is for handling glass.

This gives you an easy way to recycle a lot of materials without having to leave your home, especially in the long term. If you have done major home renovations or clean-outs and have a lot of glass to get rid of, then you can always load it into a dumpster and forget about it.

Even better, if glass breaks in a dumpster, it will not become a hazard to anybody. The dumpster can contain it, meaning that there will not be glass shards all over your lawn.

How To Declutter Kitchen Countertops For Good

If you are tired of walking into the kitchen and having no space for anything, then this is the guide for you.

Many of us will find ourselves asking for more counter space whenever we walk into the kitchen because there seems to be less and less space as time goes on. Even if you have a large kitchen, counter space is highly valuable, and we could always do with more.

Whether you are cooking, cleaning, baking, or simply spending time in the kitchen, you may feel stressed by your lack of counter space. It is easy for kitchens to become cluttered, and one of the worst spaces for this is the counters.

For example, you wouldn’t be able to leave your electric stove top oven out on your curb for Brookhaven waste management to pick up.

Instead of redesigning your whole kitchen or looking into moving, you can create more space in the kitchen with a simple declutter. 

How To Declutter Kitchen Counters

1) Completely Clean The Counters

The first step in any decluttering project is to clear the space you are working in. For the kitchen, take some time to remove everything from the counters, including decorations, cooking utensils, appliances, and general clutter.

Move all items to a separate flat surface, like the dining room table or even the kitchen floor, so you can assess each separately. 

When the counters are empty, take some time to clean them with antibacterial spray and make them sparkle.

2) Choose What To Keep

Look at all of the items you have taken from the counters and determine what you truly need to keep. This means considering each item and deciding whether you use it, whether you need it and whether you even like it.

Even if you choose to keep certain appliances, they do not all need to be displayed on the counter. Consider what you need out every day and what will be used the most.

Things to consider keeping on your counter include:

  • Coffee maker
  • Toaster
  • Dish rack
  • Fruit basket
  • Container of most-used utensils
  • Microwave

Be selective with what you keep and what you choose to have displayed on the counter. Consider only the items you use every day and need instant access to as this will prevent clutter.

3) Find A Permanent Space

Once you have considered the items you are going to keep on the counters, you now need to find space for them.

Take time to find the best and most logical space for each item, a space that makes them easy to access while also giving you enough counter space for other activities.

Some ideas to consider when placing appliances include:

  • Placing the coffee maker near the cupboard where you store your mugs for easy access
  • Keep the cooking tools and utensils near the stove

When you keep items near like-items, you will be keeping the kitchen clean and preventing clutter from spreading across the counters. It will also make things easier for you as you cook, bake, and make your morning coffee every day.

4) Sort And Relocate Other Items

Now you have organized your counters, it is time to tackle the items that are left behind.

It is likely that you still have a good collection of appliances and utensils that you want to keep but do not want to have on the counters. To prevent clutter, you will need to spend time figuring out other logical places for these items, so they do not end up back on the counter.

Good ideas for permanent places include:

  • An easily accessible cabinet for less used appliances, such as the blender. Make sure to inform the rest of the family where they can be found and let them know they must put things back
  • Decorations should be hung onto the walls wherever possible, but the window sill is a great location for plants. Any other decorations should be moved to another room as the counter is too valuable to give up to décor
  • Seasonal items, such as those used around the holidays or once every few months, can be placed in the highest cabinet or on the higher shelves in the kitchen, so they are not in the way

Any appliances that you do not use should be decluttered. If they are in good condition and still work, then they can be donated, and broken items may be recycled.

How To Keep The Kitchen Organized

Decluttering the kitchen counters is a fairly quick task, but keeping them this way is not. 

The key to keeping your kitchen counters clutter-free is to organize your entire kitchen, so everything has a place. This will make it easier to put everything away once they have been used.

Keeping the kitchen clean and organized is not something you can do on your own. You will need to let the family know that you are making these changes and inform them of the new rules for the kitchen so everyone can get involved.

New Rules For The Kitchen

  • Make sure that all dirty dishes go straight into the dishwasher or the sink and are never left on the counters
  • Spend some time clearing the counters every night before bed, so you wake up to a clean, organized kitchen
  • Do not allow paperwork or anything else that does not belong in the kitchen onto the counters
  • Keep all cabinets and drawers organized, so it is easy to put things away

When the family works together, the kitchen will stay organized. 


Innovative Walk-In Closet Organization Ideas

While you may be lucky enough to have a walk-in closet at home, likely, this space is not being used to its fullest potential.

Perhaps you are wishing your closet looked more like a luxurious boutique, or perhaps you simply want to be able to find your favorite sweater when the weather changes. 

Whatever your current goals are for your walk-in closet, the space most likely needs to be organized.

Where To Start

The first step in organizing your walk-in closet is to empty the space. Take some time to remove everything from the closet, including all clothing, boxes, shoes, and even the random items you have dumped there in the past.

With well over 200 acres of open space and parks to visit, Caln Township is a relaxing place to visit.

Once the closet is empty, you can clean the space, so it is fresh and ready for the new shape to take place.

Wipe down all shelves, vacuum the floor and make sure the space is spotless.

Deciding What To Purge

You will not be able to organize your walk-in closet if you continue to hold onto items.

Organizing clothing can feel emotional, but it does not have to be. Instead of focusing on the feeling of the clothes and getting nostalgic, focus instead on practicality.

When decluttering, ask these questions:

  • Have I worn this item in the past year?
  • Does this item fit?
  • Do I like this item?
  • Is this item damaged, and will I fix it?

To keep yourself on track when decluttering the closet, place clothing into three piles: keep, donate and throw away. 

While it is best to donate old clothing, some items cannot be saved and should instead be recycled wherever possible. 

Do not hold onto items because you once loved them or because you are hoping they will fit again at some point. The best way to declutter is to focus on your current lifestyle and the current needs you have for your wardrobe, as this will prevent you from holding onto things you do not use. 

How To Maximise Closet Space

Once you have decluttered the items in your closet, it will be easier to see what space you have available in the closet.

This is a good opportunity to consider reworking the current layout and the storage solutions you are already using. Chances are, these have not been working for some time, so now you can change them to make things work with your new wardrobe.

  • Consider your vision 

Think about your vision for the wardrobe and how you want to feel as you get dressed every morning. 

If you want to feel calm and stress-free, then prioritizing organized hanging space and making sure all your most worn items are easily accessible is a must.

  • Make sure you have hanging space

No matter what you are looking for, hanging space is always going to be more beneficial than shelving, so make sure you have enough of this in your closet so you can keep organized. 

  • Use your closet’s height

Taking advantage of the height of your closet means you are taking advantage of the storage space that is already available.

You can do this by dedicating at least one wall of the closet to hanging rods, making sure they go up to the ceiling if this is possible. Double rods can be a great way to organize shirts, jackets, and pants, but a longer space is needed for dressed and formal gear.

  • Put like items together

A great way to organize your closet, and to keep it this way, is to organize like-items by categories. 

Keeping all shirts together and all bottoms together can make it easier to get ready every morning as you can move through the closet as you do so.

Another great tip is to keep your most worn items in the prominent spots of the closet, such as the hanging space at the front. You can organize your weekly outfits or work clothes in this spot so you can get ready faster than ever before.

  • Keep storage accessible

No matter what kind of storage solution you choose for your closet, from shelves to plastic boxes or container drawers, make sure it is accessible.

The easier it is to get your clothes and to put them away in their correct spot, the easiest it will be to keep your closet organized at all times. 

Some simple solutions are storing shoes on a shoe rack, where you can see everything you have clearly and can keep things in their place, or using open shelves to display hats and bags.

The storage solutions that work best for you will differ based on the space you have available. Regardless, make sure you can access items in storage and that everything has its own dedicated space.

  • Use hooks for display items

If you do not have shelving, you can install hooks for bags, hats, or jackets. This will make them easy to access and keep hanging space free for the clothing that needs it.

  • Don’t forget to organize drawers

Drawers can be a useful organizing tool for smaller items, including underwear or socks, but they only work if they are kept neat.

You can either buy or make drawer compartments to keep items separated so they will be easier to find and put away at the end of the day. If you are working on a budget, you can use old shoeboxes or cardboard to make these dividers.


4 Simple Home Gutter Repairs

While you may not give the gutters around your home much thought, they are incredibly important. It is the gutters you have to thank for every door, window frame, and siding that is not rotting from water damage right now. 

Gutters are also responsible for protecting the foundations of your home from cracking and preventing flooding in the basement. 

With all of this work that they do, it is a big deal when your guttering gets damaged. 

Cochranville, Pennsylvania homeowners can now enjoy an easy dumpster rental experience thanks to Chester County’s Eagle Dumpster Rental.

Luckily, not every damaged gutter requires expensive call-out fees or extensive repair work to be done as you can repair them yourself. 

How To Repair Sagging Gutters

Over time, gutters can sag due to debris pileups, weather issues, or other conditions which can be out of your control. 

Regardless of the cause, it is important to fix gutters that are pulling away from the house as this can cause drainage problems or foundational issues. 

  1. Use a claw hammer, pry bar, or locking pliers to remove the spikes that are currently holding the gutters to your house. If your gutters are held on by screws, then use a drill to unscrew them
  2. If you are working with a gutter that is currently held on by spikes, then you should invest in gutter screws to replace them, as these give a sturdier hold
  3. When working with a screwed gutter, this is the time to replace any screws that are damaged, bent or broken
  4. Line the gutter back up using the current screw holes. Drill the new screws into these positions, being careful to not drill too far, which will bend the gutter again

If you feel as though the screws holding your gutter up are not snug enough, you can fill in the gaps with small strips of wood. Coat the wood with all-weather adhesive and push them into the screw holes before drilling, as this will make a snug fit.

How To Fix Gutter Leaks

Leaky gutters are a sure-fire way to find water damage and foundation issues within your home, so they need to be repaired quickly. 

Almost all leaks in gutters are caused by two sections of the pipes falling apart, which can be caused by extreme weather or temperature fluctuations. 

Repairing this issue does take some time, but it is simple enough to DIY.

You Will Need

  • Screwdriver
  • Utility knife
  • Medium grit sandpaper
  • Caulking gun, silicone caulk
  • Wire brush
  • Matching spray paint

How To Make Gutter Seam Repairs

  1. Using the utility knife, chip away the caulk around the screws which are holding the two leaking pieces of gutter in place 
  2. Remove the screws using a screwdriver and pull the gutter pieces apart
  3. Using the utility knife again, remove the remaining caulk that may be left on the pieces of gutter you have taken from the wall
  4. Any rust that may be on either piece of the gutter can be removed using a wire brush. You can use this brush to scrape away rust before smoothing the area with sandpaper and filling the faded color with spray paint. Make sure the gutter is dried completely before the next step
  5. Use the caulking gun to apply the silicone sealant to the inside lip of the ‘downhill’ gutter piece, which is the bottom pipe
  6. Carefully lower the ‘uphill’ or top piece of the gutter into place and press both pieces firmly together for 30 seconds to seal
  7. Replace all screws and apply the sealant around them for a snug fit

Make sure to remove all of the old caulk before attempting to fix your new guttering into place, as fresh caulk will not seal onto residue.

How To Fix Overflow Problems

If water regularly overflows from your guttering, then you are not dealing with clogged pipes but rather pipes that are not sloped enough. Guttering needs to be sloped enough so the water can run freely through them.

Your guttering should slope downwards a quarter of an inch for every 10 feet. When this ratio is off, overflow occurs.

This issue can be resolved with some DIY skills:

  1. Starting at the furthest end, measure the distance between the bottom of the fascia board where the downspout is attached and the bottom of the gutter. Mark these measurements to refer to
  2. Move 10 feet down the gutter and measure the fascia board a quarter of an inch lower than the original measurement
  3. Reposition this section of the gutter according to your new measurements, ensuring that it now rests on the new mark you have made by unscrewing and screwing whenever needed
  4. Continue measuring the gutter in 10-foot segments, making sure that each section now lies a quarter of an inch lower than it used to
  5. Once you have completed this process, use the garden hose to make sure water flows freely through the gutter

How To Prevent Water Pooling Around The House

Water pooling around the foundations of your home is not something to ignore, and the repair could be incredibly easy to do alone.

  1. Place a splash block under the downspout, as this will redirect water away from your house
  2. Attach a roll-up sleeve to the downspout, which will capture rainwater and push it away from your house. Following a downpour, you can roll up the sleeve to prevent it from getting damaged 


7 Water Recycling Ideas To Reuse Water At Home

Being able to reuse water around the home becomes a priority when you realise how much you are using every day. 

The US Geological Survey reports that the average American uses between 80 to 100 gallons of water daily between the toilet, bathing, and drinking water. 

If you are in a drought-prone area, then you will be aware of how important it is to save water, but everyone can do their bit when it comes to their water usage. Every drop of water saved goes a long way for the environment, and it can also be a great way to save money on your energy bills too.

With an area so rich in natural beauty, Chester Springs PA requires proper waste management protocols.

7 Easy Water Recycling Tips To Try

If you are looking to recycle and reuse water at home, the following tips are a good place to start.

  • Place A Bucket In The Shower

This is one of the easiest ways to save water at home, and it can be done every time you get a shower. Before turning the shower on, place a bucket under the stream to collect the water that is being used. 

This water can then be used in the garden or to flush the toilet.

  • Reuse Water From Old Drinking Bottles

Most people will have a small collection of half-drunk water bottles in their car, their locker, or their backpack. If this is the case for you, do not throw the water away and instead reuse it elsewhere.

While it may be too stale to drink, it can be used to water plants or the lawn.

  • Use A Rain Barrel To Save Runoff From The Roof

As well as getting creative to reuse the water within your home, you can also reuse the water that is provided by Mother Nature too.

Placing a rain barrel under the downspout of your guttering is a great way to recycle water, and it can collect a lot during wet weather. This water would have otherwise flown downstream and can now be reused in washing the car, cleaning the patio, or other chores.

You can buy a rain barrel from home improvement stores or make one yourself.

  • Use Pasta Water For Your Plants

If you are making a pasta dish for dinner, do not dump the water that has been boiled into the sink. Instead, you can use it to water plants indoors or outdoors once it has cooled down.

  • Reuse Water That Has Washed Veggies

A lot of water can be reused and recycled once it has been used in the kitchen, including that which has washed the vegetables you are eating for lunch.

Much like collecting pasta water, you can use a container to collect the water that has gone through the strainer to clean vegetables so it can be reused elsewhere.

With all of this collected water, your house plants or garden will never have looked better!

  • Install A Grey Water Collection System

This step does require some plumbing work and more investment than the others, but it can be an excellent way to recycle water. 

With a greywater collection system, you can reuse the water that has washed your clothes to irrigate your lawn. 

It is important to note that this kind of water collection system is not available in all locations, and in some states, it may be illegal. Check with your local authorities before installing a greywater collection system to ensure it is safe for you.

If this is legal in your area, it is best to hire a local plumber for the installation to make sure it is done right. You can check out these collection systems at Water Wise Group, which offers a variety of systems as well as educational materials so you can learn more.

  • Scatter Leftover Ice On The Lawn

Following a family gathering or an evening sharing drinks with loved ones, you can still do your bit for the planet by reusing your leftover ice.

This is a less-than-obvious trick, but one that can be very effective for recycling water and is very easy to do. 

Instead of letting your leftover ice cubes go down the drain, you can scatter them in the garden to water the lawn. This is a hack that is best done in the summer when your lawn is more likely to need watering and the time you will be using ice in all your drinks.

Small Steps Make A Big Impact

Recycling water seems like a large task and one that may take over your life, but we hope that you can see that this does not have to be the case. These tips can be incorporated into your daily routine and will help us move towards a better, healthier future. 

As with many things, the smallest steps can still make a difference, and it can be easy to incorporate recycling water into your routine. 

There are some small things you can do every day that may take seconds, like throwing ice on the lawn or collecting shower water, but will have such a good impact on the greater environment.

If you have made it a goal to change your habits to be more sustainable, recycling water is a great way to go.

We have shown that being kinder to the environment can be easy and can be added to your daily routine. 


Five DIY Plastic Bag Projects

Several states have already changed the rules when it comes to plastic shopping bags. Whether you have to pay a small fee to use single-use plastic bags or are given other options, many states are taking steps towards a more environmentally friendly future.

Even with these steps, single-use plastic bags continue to be around, and you are very likely have a drawer dedicated to them at home. It has been reported that over 100 billion plastic bags are used every year in the US alone, so this is an issue we all face.

Eagle Dumpster Rental is proud to serve residents of Rockland, Delaware with reasonably-priced dumpster rentals and roll-away containers.

In most cases, these plastic bags cannot be recycled, but that does not mean they have to be thrown in landfills. There are some fun, innovative ways that you can use these plastic bags to prevent them from being thrown out.

5 DIY Plastic Bag Projects

You can use your plastic bags to make fun items that can be useful around the home. The following five ideas are some of the easiest and great ways for you to reuse those plastic bags that clutter your home.

  • Plastic Coasters

You can reuse your plastic bags to make coasters that will protect your furniture from ring marks. Coasters can come in all shapes and sizes these days, but you can stand out with this fun DIY project.

All you need is some plastic bags and an iron to fuse them.

  1. You can cut the coasters into any shape you want, but a simple circle is a good place to start. Using a jar lid or something similar as a guide, cut the bags into this shape 
  2. Lay some unprinted paper onto the iron board and place the cutout plastic on top
  3. Cover the plastic with another sheet of paper to prevent it from sticking to the iron
  4. Iron each side of the plastic for 10 to 15 seconds 

Then you will have some fun and free coasters which can protect your furniture.

  • Friendship Bracelets

This is a fun project for children, and it can be a good way to recycle old plastic bags.

Simply cut the plastic bag into three equal strips and braid them together. With some practice, you can use different braiding styles for your bracelets, but this is a fun and simple activity that you can get the whole family involved in.

  • Jump Rope

If the kids are messing up your house and have too much energy to burn, you need to get them outside. It can be hard to keep little ones entertained, but a jump rope is a great toy for kids of all ages, and you can make one for free using plastic bags.

With the same skills required for friendship bracelets, you can make a jump rope by attaching several bags in a long braid.

Not only is a jump rope a great toy for the kids, but it is also a great workout for the adults, and you can make one for free!

  • Reusable Tote Bag

In many states, plastic bags are being replaced with reusable options like tote bags. But you can take your sustainable efforts to the next step by making a reusable tote bag from the plastic bags you have collected over the years.

There are several tutorials online that you can follow to make a tote bag using plastic, and it can be done easily. 

Next time you go shopping, you will not have to pay for a plastic bag nor feel guilty for impacting the environment because you are prepared. Instead of using the same tote bags from grocery stores as everyone else, you can stand out with your DIY project.

  • Storage Baskets

Once you have gotten the hang of braiding plastic bags and have managed to make a reusable tote with them, you can take these skills elsewhere.

Storage baskets are a great way to keep organized within the home, and they can be used in every room. However, instead of buying storage baskets – many of which are made of plastic – you can make your own using plastic bags.

This project does require a lot of bags and a lot of time, so it can be a good way to spend a free weekend if you are feeling crafty. With plastic bags, you can make as many storage baskets as you need and of multiple sizes.

This is a sustainable project that can save you money, as you are reusing what you already have, meaning you can organize your home for free.

Use Your Free Time Wisely

These are just some of the ways that you can reuse plastic bags, and there are many more projects ideas online, based on how much time you have and how many bags you want to get rid of.

Plastic bags are a  serious threat to the environment, so being able to reuse them creatively is so beneficial. 

If you have some free time, why not use it wisely? Instead of doing the same thing as every other weekend, do something fun this weekend and gather some plastic bags. You can get the family involved in a fun DIY project. 

Whether you want to make friendship bracelets or something more complicated like a storage basket, there are tutorials online for free. 

You can have a great time while reducing your impact on the environment, making it beneficial for everyone. 


How To Reduce Waste At Home

Most homes generate a lot of waste daily, whether it is recycling, food waste, or general household trash. If you are struggling to manage your waste and are feeling guilty about your impact on the environment, then we have some tips to share with you.

Reducing your waste at home can be a good way to save money too, so it is worth trying.

  • Reuse Bags and Containers

A lot of the waste that is generated by our homes comes from single-use items. Plastic bags are one of the biggest causes of waste across the world, and they continue to be a large issue.

Moving your manufacturing company to the Borough of Denver will require remodeling of your new commercial space.

You can reduce your impact on the environment and save money with reusable items. Tote bags and reusable containers can be a highly effective way to reduce your waste as they only need to be bought once and can be reused. 

  • Avoid Individually Wrapped Items

When you do your grocery shopping, take a second to notice how much of the food you buy is wrapped in plastic. While this is not something you can avoid completely with ease, you can reduce your impact on the planet by avoiding individually wrapped items.

This means avoiding individually wrapped blocks of cheese or single pieces of fruit wrapped in a plastic coating when shopping. 

  • Reduce Unwanted Mail

One of the easiest ways to reduce your waste at home is to go through your mailbox.

How much junk mail do you get, like vouchers, magazines, or leaflets, which just end up straight in the trash? You can reduce your subscriptions and take your address off mailing lists to prevent all of this unnecessary waste.

It is also possible to go paperless with the mail you truly need, like bank statements and household bills, which can reduce waste. Instead of being sent to your physical mailbox in letter form, these companies will email your statements to you so you can still keep track of your outgoings without waste.

  • Meal Planning

Most households produce a lot of food waste without thinking about it.

We know that grocery shopping has become more expensive over the years, yet many of us still struggle to get it right and end up wasting a lot of the food we buy. 

The easiest way to reduce food waste, which not only improves the planet but also helps you to save money, is to plan out your meals.

Take an hour with the family to plan out the meals for the next week. This way, you know what is needed, and you can ensure that the food you buy is being used before it goes bad.

When meal planning, check what you already have at home in the refrigerator and pantry to see whether you have useable ingredients already. Combining these with your new, reduced grocery shopping will dramatically decrease your household food waste.

  • Buy In Bulk

Bulk buying is something that can work well with select items, so you will need to consider this step carefully before jumping in.

However, buying some items in bulk at wholesale grocery stores can be a great way to reduce your waste as there is less packaging. It can also help you save money, as there will be better discounts on bulk items compared to individual items.

Bulk buying household items like trash bags and toilet rolls is a good way to reduce waste because they require less packaging, and these are items we all use regularly.

  • Compost Food Scraps

While there are ways you can reduce food waste, likely, there will still be scraps left, as well as vegetable or fruit peels.

Instead of adding these to landfills, you can add a compost bin to your kitchen for food waste. Here, the food scraps will be collected so they can be used in compost and therefore will be put back into the earth to help new life develop,

This step does require some patience, but it can be a good way to bring new life to the garden and to protect your outdoor spaces while also reducing waste.

  • Go Paperless

We have already mentioned going paperless when it comes to your mail, but there are many other ways that you can reduce your paper waste at home.

Almost everyone has a smartphone these days, and it can be used for a lot more than messaging friends or scrolling social media. You can use your phone as a way to go paperless by keeping your schedule on the device using the notes app and the calendar instead of paper products.

This way, you can keep all important documents in one place and reduce your need for paper.

  • Donate Gently Used Items

Do you struggle to find an outfit every morning? This is a clear sign that you have too much in your closet, and a declutter will make things easier for you.

You can donate gently used items to thrift stores or local charities, preventing them from going into landfills. You can also sell items online to make some extra cash while also reducing waste.

  • Borrow And Rent

If you are working on a DIY project, you do not need to buy new tools every time. 

You can borrow or rent items which is a cheaper alternative while also reducing demand, thus the impact on the environment. 


Your Guide To Recycling During The Holidays

The holidays are the perfect opportunity to treat your loved ones and spoil them with gifts. While gifts may be the main thing on your mind at this time of the year, it is also a good time to treat the planet with kindness too.

During the holidays, household trash increases dramatically with all of the gifting and additional food. It has been estimated by the EPA that households throw out an additional 25% of trash between Thanksgiving and New Year, which is very damaging for the environment.

As your project plan comes together and you gather your materials, your employees, or your equipment, make sure you plan for dumpster rental in Douglassville, Pa as well.

It is possible to have a good holiday season without negatively impacting the environment. We are going to share some of the best recycling tips to make this the best holiday season yet.

Recycling Wrapping Paper

Based on your location, there may be schemes in place for recycling wrapping paper. It is possible to recycle almost all kinds of wrapping paper, depending on what it is made of.

If the wrapping paper is metallic or has glitter on it, then it cannot be recycled, but most other types can.

How To Recycle Wrapping Paper

  • Check with your local recycling facility to see whether they accept wrapping paper, as well as the limitations on this
  • Prevent metallic or glitter wrapping paper from going into the recycling as it cannot be made into new paper
  • Tissue paper cannot be recycled as the fibers are too thin, so keep this out of the recycling too. It can be composted instead

Alternatives To Wrapping Paper

As it can be difficult to recycle traditional wrapping paper, you could make some changes this year to be more environmentally friendly.

Instead of wrapping paper, you can use:

  • Reusable wrapping paper, like Lilywrap
  • Fabric
  • Magazine or newspaper pages
  • Paper shopping bags
  • Old pillowcases or clothing

Recycling Christmas Ornaments

Unfortunately, most Christmas ornaments cannot be recycled as they are usually made from mixed materials. Mixed materials are difficult to recycle as they cannot be easily separated.

Ornaments that are made from a single material, such as wooden ornaments or glass baubles, cannot be recycled with your household waste. This is because they are usually treated with chemicals that will contaminate all other waste in recycling.

The only exception to this rule is paper ornaments, as these can be easily recycled.

How To Recycle Christmas Ornaments

  • Do not throw Christmas ornaments into the recycling bin with other waste as they can contaminate the trash
  • Homemade paper ornaments can be recycled as long as they have not been treated with glitter. If you can remove non-paper items, like beads, this should be done before they can be recycled
  • The best option for Christmas ornaments is to reuse what you can

How To Reuse Christmas Ornaments

  • Broken glass bulbs can be reused as mosaic pieces in craft projects
  • Donate ornaments that are in good condition to local thrift stores or local charities
  • Ornaments can also be donated to local shelters or care homes to be reused
  • You can also sell ornaments which are in good condition during the holidays – this works best for big-ticket items 

Recycling Christmas Lights

Decorating your home for the holidays would not be complete without twinkling lights, and luckily there are plenty of options for recycling these.

Christmas lights should not be put into your curbside recycling trash can, but they can be recycled elsewhere, whether this is by being dropped off or sent via mail to recycling centers.

How To Recycle Christmas Lights

  • Check out your local homeware stores, like Home Depot or Lowes, as many will offer recycling programs for Christmas lights
  • Check out local scrap metal collectors, as many companies will take Christmas lights so they can remove the valuable copper to sell and recycle the rest
  • Mail old Christmas lights to recycling programs such as HolidayLEDs or Christmas Light Source

These recycling programs can be accessed all year round and, in many cases, will offer a discount which can be used for new lights or decorations.

Recycling Greeting Cards

The holidays are a time for getting in touch with loved ones, and usually, this is done through greeting cards. It can be easy to recycle greeting cards if they are made solely of paper or cardstock as they can be thrown into your curbside recycling bin with other waste.

Cards that contain non-paper elements take a little more effort to recycle.

How To Recycle Greeting Cards

  • Cards covered in glitter or foil cannot be recycled so will need to be thrown in the trash with other household waste
  • You can remove the sections of the cards that are covered in glitter or foil so the rest can be recycled
  • Ribbon, metal, or other charms need to be removed from the cards before they can be recycled 
  • If you have cards that play music, the electrical elements need to be removed before they can be recycled. These electrical elements can be recycled if your city has an e-waste program
  • Paper envelopes can be recycled along with the cards 

Recycling Artificial Christmas Trees

In most locations, artificial trees cannot be left on the curbside for recycling. However, it is possible to keep your old tree away from landfills with a little effort.

There are other programs available for recycling artificial Christmas trees in most locations, as well as ways to reuse old trees, even if they are worse-for-wear, with some creativity. 


50 Ways To Conserve Natural Resources At Home

World Conservation Day is celebrated on July 28th, and it is a time to consider the ways that we can create a healthier environment for everyone.

While changing your habits and becoming more sustainable can seem overwhelming, there are some small steps you can take to become more environmentally friendly, and this time of year is your chance. 

In honor of World Conservation Day, the following are some ways that you can conserve natural resources from the comfort of your home. 

Acme, Pennsylvania is completely within our delivery radius at Eagle Dumpster Rental of Westmoreland County.

How To Conserve Water At Home

Save The Water claims that the average American uses 2,000 gallons of water daily, which is having a huge impact on the environment. The same study claims that the average family in Africa uses only 5 gallons of water per day, so it is time to make changes.

  • Only do laundry when you have a full wash load
  • Only run the dishwasher when there is a full load
  • Collect water when showering in a bucket which can then be used to water flowers and plants outside
  • Turn off the faucet when brushing your teeth 
  • Harvest rainwater to be reused in the garden or elsewhere at home
  • Create a lawn watering schedule based on a watering calculator to prevent overuse of water
  • Replace appliances and showerheads with water-efficient options

How To Cut Packaging And Food Waste

From production and distribution, food relies on a lot of natural resources and can harm the environment before it even enters your grocery cart.

Taking care of the leftover packaging, food scraps, and cardboard boxes can prevent food waste from going into landfills where they can emit harmful chemicals and impact the environment, thus reducing the overall impact of the food industry on the environment. 

  • Plan your meals every week to prevent food waste
  • Stick to a shopping list when getting groceries
  • Start a compost pile for food scraps and peels
  • Cut down on processed foods that stay in cupboards, using what you have
  • Use reusable containers for packed lunches or take food on the go
  • Skip the fast food and choose homemade meals instead
  • Reuse water bottles and plastic bags as much as possible
  • Reduce the need for single-use plastic straws, paper plates, and plastic cutlery
  • Start a community garden for compost piles 

How To Save Fuel

Emissions from traffic are one of the biggest pollutants on the planet, and this is something we are all aware of. 

To reduce your impact on the environment, you can adjust your driving habits. Even the smallest changes can have a positive effect on the environment, and they could also help you save money too.

  • When idling for longer than 15 minutes, turn off your engine
  • Use ride-sharing apps like Uber and Lyft as much as possible
  • Take public transportation like buses or trains whenever possible
  • Carpool to work with colleagues
  • If your budget allows, consider buying an electric vehicle for your new car
  • Walk whenever possible
  • Cycle to work or into town for errands instead of driving
  • Unless your vehicle requires premium fuel, use regular fuel if available
  • Avoid fast food lanes as these require a lot of idling
  • Keep your tires fully inflated as this supports better fuel economy
  • Only use the A/C in your car when necessary

How To Use Less Paper At Home

Paper is everywhere in the home, whether it is in the mailbox, cluttering the desk, or unopened mail on the dining room table. While a lot of paper can be recycled, the best way to protect the environment is to reduce all forms of waste, which means cutting out paper whenever possible.

The more paper that is demanded by everyday people, the more trees that are cut down to provide it. By decreasing the demand, we can keep more trees alive while also keeping waste from landfills.

  • Switch to online bills and bank statements
  • Opt-out of subscriptions, especially for catalogs and junk mail
  • Think before you print anything at home or in the office, as it could be kept as a digital copy 
  • Recycle all paper products based on local guidelines to prevent contaminating trash
  • Subscribe to digital publications and magazines instead
  • Donate cardboard boxes after moving or online deliveries as they can be reused by others

How To Use Less Electricity At Home

Power plants release byproducts and other contaminants into the environment, which can be negative for nature as well as human life. While these are large corporations, we can make small changes to the use of electricity at home, which will positively impact the greater environment.

  • Unplug all appliances, especially chargers, when not in use
  • Instead of running the A/C, open the windows for natural cool air
  • Close the shades during sunny hours to keep the home cool
  • Turn off all lights when leaving home or when a room is not in use
  • Install timers or motion detectors on outdoor lights
  • Replace old lightbulbs with LEDs

Other Ways To Celebrate World Conservation Day

If you have already made a lot of changes to your home or are looking for something new to do, there are other great ways to celebrate World Conservation Day when it next arrives.

  • Plant flowers for wildlife
  • Buy locally-sourced meat
  • Donate unused items to local stores or charities
  • Buy secondhand items 
  • Use sustainably sourced products around the home
  • Work with a local nonprofit that focuses on the environment


6 Steps to Install a Carpet

Carpet installation can seem like a very complex thing at first, but it can actually be a very simple process as long as you know what you are doing. Breaking down the entire installation process into six simple steps can help a lot, making it much easier to stay focused on getting the job done.

If you are prepared to lay down a carpet all by yourself – or even if you are just considering it – then these six steps can make the whole thing a lot more convenient. If you have a plan to follow, then you can get your carpet installed quickly, cheaply, and without any lingering issues to worry about.

Step 1 – Measurements

Measuring out the space that you are working with is incredibly important and should always be the first step when working with carpet installation. No matter the kind of carpet you want, it is important to get accurate measurements so that you can judge the amount of material you need.

For more information about our rates, pricing, and availability in Aliquippa, contact Eagle Dumpster Rental and get a free estimate on a 10, 15, 20, 30, or 40 cubic yard dumpster for all types of projects in Aliquippa and Beaver County, PA.

Remember to segment an oddly-shaped room into rectangles and measure them independently rather than as a whole. L-shaped spaces are hard to measure as a whole but can be broken down into two or more different sections.

Always add a few extra inches to your measurements before multiplying them to get the total size of the space. This gives you more material to work with and helps you compensate for any mistakes or errors you might have made in the exact measurement amounts.

Step 2 – Preparation

Make sure you have your carpet ready as soon as you can. The type that you choose does not matter that much: what is important are the tools and prep work that you need to have done before you can install it.

Try to get hold of the tools you will need to actually lay the carpet: things like duct tape, tack strips, a staple gun (if you need it), utility knives, tape measures, carpet rollers, and anything else that might be necessary for the installation process.

If you are working with concrete, then you will also need carpet adhesive, construction adhesive, masonry nails, and/or cement-based filler. Of course, every project is different, so plan ahead and figure out what you will actually use.

Then, you can prepare the room. Remove the old carpet, tiles, or laminate flooring, and make sure that you check the subfloor. If it is too damaged in spots, then you will usually want to replace those damaged sections.

Step 3 –Tack Strips

Tack strips are a vital part of installing any carpet, regardless of the flooring that you use. Place them roughly half an inch away from every wall and make sure that there are no gaps between strips (except when you are placing them near doorways).

These tack strips act as a shortcut to hold the carpet in place and are the standard method of modern carpet installation. How you install them depends on your flooring material: with wood, you can simply nail it down, but concrete requires the specific materials mentioned earlier.

Step 4 – Underlay

Your underlay pieces help keep the flooring comfortable and stop the carpet from being bunched up in strange ways – ideally, you want to lay them perpendicular to the direction that you will be placing the carpet down. Concrete flooring needs a synthetic fiber underlay to handle condensation.

Make sure that your underlay is touching the tack strips but not laying over them, then staple it into place (or use carpet adhesive for concrete flooring). The leftover seams can be covered with duct tape to get complete coverage.

Step 5 – Carpet

Now for the actual carpet itself. If you have not cut the carpet already, then make sure to cut the strips to size, with around six inches leftover just in case you need to trim it down further. 

If you cut too much off now, the strip is essentially useless to you, so be very careful.

When your first strip is ready, put it flush against the wall and then pull it across till it touches the opposite wall as well. Put a chalk line on the carpet, where it meets the wall, and then cut away the excess material so that you get a near-perfect fit.

You will want the pile directions to match. These pile directions change how the carpet looks in terms of color since the fibers might look completely different when brushed forwards compared to being brushed backward. If they are mismatched, the carpet may look mismatched too.

Overlap each strip with the previous one by an inch or two, and then cut through them both at once. This allows you to achieve a perfect fit without much stress. You can seal the seams between pieces of carpet (from the underside) using seaming tape and a seaming iron.

Step 6 – Fitting

Finally, you have to get the carpet stretched out. Once the carpet is fully laid, start in the center of any wall and try to push, kick, or even knee the carpet up against the wall.

The tacks that you laid earlier will allow the carpet to catch, meaning that you can effectively just nudge it against the wall’s edge, and it should stick. Larger spaces can benefit from a dedicated power stretcher tool, but this depends on the project itself.

It may take some fiddling to get the carpet exactly how you want it, but once the carpet is actually down, you mostly just need to get it in the right position. Take it slowly and keep moving it where it needs to be, then get ready to clean up once it is all done.

When Should You Replace Appliances?

Your appliances can’t last forever, and there will always be a point when you need to replace them with something new. Whether it is because they are outdated or because they do not work anymore, swapping them out for something fresh and more functional has a lot of useful benefits.

However, you also need to know when you should replace them. It can often be beneficial to keep them around for a while to avoid extra expense – but if you keep them too long and continue to repair them, you will eventually spend more than you could have saved.

Repair vs. Replace

There are benefits to both repairing and replacing your appliances, and neither is the best option in every situation. Sometimes, the cost of replacing something is far higher than simply repairing a minor fault or ordering a new specific part that you need to keep it running.

Rent a dumpster in Allen, Maryland or the 21810 ZIP code today with Eagle Dumpster Rental, the top-rated waste management services provider in Wicomico County.

On the other hand, replacing an appliance can save you a lot of money that you would have otherwise spent on constant repairs. If your existing equipment is already outdated, replacing it means you are getting an upgraded appliance, which might be less prone to issues in the long run.

When to replace

Replacing your appliance should not be your first reaction to a minor fault, but there are always going to be situations when it is much more effective than trying to repair them. Understanding the signs of a replacement-worthy appliance can be an important part of managing your home and budget.

Remember that you will have to remove your old appliance: consider getting a dumpster rental from companies like Eagle Dumpster Rental to help move and dispose of it safely.

Washing Machines

The humble washing machine is a major part of any home, but it thankfully also is not that expensive. One of the most common signs that something is seriously wrong is usually the noise, especially if the regular vibrations get louder or you start to hear banging and clanking.

Sometimes, you only need to replace parts of the washer. For example, the door might not close properly, or the washer hose may not fill correctly due to a build-up of limescale: both of these can be fixed by simply replacing those parts instead of the entire appliance.

Dryer

The dryer is in a similar situation as the washer, which helps since they are generally used together. It can be harder to identify issues with your dryer at first, but signs of damage or tearing to your clothes can often be one of the most notable warning signs.

Be sure to pay close attention to your dryer’s usual noises, too. While they will always be loud, you can usually pick out unusual thumping or banging if something has broken, especially if part of the assembly has come loose and is bumping around inside the dryer itself.

Dish Washers

Not every home has a dishwasher, but those that do will still need to replace it every so often. The most obvious sign of a problem is when your dishes are not actually washed properly, especially if they are still just as dirty as when they started.

Water leaks and issues with the door popping open could be the result of problems with the door itself. However, if something is wrong with the drying or heating system (if the washer has one), then you might need to either replace that part or replace the entire appliance.

Refrigerators

Your refrigerator is constantly running, so it will wear down faster than appliances that you do not use very often. If you have had one for more than about seven or eight years, then check the internal temperature to make sure that there are not any issues with cooling and freezing food.

Stoves and Ovens

There can be cases where your ovens are not directly broken but are still showing signs of not working as efficiently as they used to. This can often be shown in cases where food is cooked too slow (or sometimes too quickly), meaning that something may be wrong with the heating element.

The top stove can also have faults like this, including cracks or damaged heating components that make it less reliable overall. If you are having trouble accurately and safely cooking your meals, then you might have to replace your oven.

Heaters

Heaters as a whole are quite varied: thousands of different designs that can have an equally extreme number of different components. For example, a water heater might end up leaking if a pipe wears out, whereas an electrical heater could run the risk of starting a fire if a wire splits open.

Understanding your heater is important, but you should always double-check the heater if you think something might be wrong with it. Damaged heaters are sometimes incredibly dangerous and can have a huge amount of risk attached to them, so replacing them is often the best choice.

HVAC

Your heating, ventilation, and air condition system can have multiple different faults, but worn-down or damaged parts will still allow the HVAC to keep working with very little issue. However, this loss of efficiency means that it will cost more to run, increasing your energy bills in the long term.

If you notice an increase in energy bills or a loss in heating and cooling power, then it is often best to just replace your HVAC. After about twelve to fifteen years, you are likely to encounter issues that would be a lot more expensive to repair compared to simply replacing the HVAC entirely.


A Quick Guide to Maintaining Your Deck

An outdoor deck can be a wonderful addition to any home and a great place to spend time, but it also needs maintenance now and then to keep it safe and usable. Maintaining your deck is not as complex as it sounds, but having an actual guide to follow is much easier than just guessing.

We’re the best value option in Allenport and the entire Washington County region of western Pennsylvania.

Here are some things to keep in mind if you want to make sure that your deck is well-maintained. Not all of these will apply to you right away, but they are worth remembering the next time you notice an issue with your outdoor spaces.

Inspecting your Deck

When you are checking your deck, you want to be sure that you are not missing anything obvious, especially if it could be a sign of damage.

  • Check for rot. Rotting wood can be a huge problem, although you can remove smaller spots with some wood preservatives. Working out why the wood is rotting can also make a huge difference.
  • Identify any cracks or pushed-out nails on the surface of your deck, and be sure to replace anything that could be a possible weakness or hazard.
  • Shake railings, especially stair railings. They can sometimes become loose if even one nail falls out of them, and this can be a major safety hazard.
  • Be sure to look at all of the posts and beams that are holding up other parts of your deck – if they have suffered any kind of damage, then they might be too weak to properly support furniture or multiple people at once.

Structural Safety

Decks are not just about looking good, but about being safe to use. There are certain building codes and restrictions that you should aim to stick to, no matter how much extra work it might take to repair a deck that has violated one of these codes.

  • Railings have to be a minimum of 36 inches in height, and the guardrails on top of them need to hold 200 pounds of concentrated weight.
  • The deck itself needs to be able to support 40 pounds of load per square foot of space and should be made of wood that has been treated to resist decaying.
  • All metal components should be corrosion-resistant, and metal flashing is needed to connect the deck to your home so that rainwater does not damage and separate the two.
  • Stairs with one handrail need to be at least 31.5 inches wide, and stairs with two handrails need to be 27 inches wide. Any stairs above handrail height need to be at least 26 inches wide.

Loose nails are a major concern. You can either hammer the nail down as a temporary solution or remove it entirely. When inserting a new nail, place it near the hole rather than in the same hole – if the original nail popped out, then the same hole likely will not be a suitable place to hammer in a second one.

Dealing with Deck Wood Deterioration

A wooden deck can have multiple threats that might make it deteriorate faster than expected, and dealing with them should always be your first priority if you want to keep your deck in the best condition possible.

  • A constant stream of UV rays can begin to lighten the pigment in your wood, as well as weaken it. While this only really alters the surface of the deck itself, strong sunlight can make your wood far more vulnerable. Sealant and stains help prevent this.
  • Water can cause wood to expand and contract (when wet and dry, respectively), leading to split boards and loose nails. Sweeping your deck and making sure that you clear away puddles, leaves, and dirt on a regular basis will avoid these issues.
  • On rare occasions, various insects may try to destroy or eat your wood, often by crawling out of nearby bushes and trees. Trimming these plants and installing bug lights can both work really well here.

If the wood has decayed and become rotten, then you need to remove the rotten sections. You can use a ‘surgery’ method to only replace the rotten parts, preventing them from spreading further or acting as a structural weakness.

You will need to make sure that the wood matches up and that you have fresh nails and cleats installed. Any decayed joists also need new flashing. You can cut out a section of a board while keeping the rest, but you will need to replace that section properly.

Cleaning and Staining

Cleaning your deck is important since it allows you to easily get rid of any hazards or long-term dangers to the deck’s health and stability. It also generally makes it look nicer, so it is worth cleaning your deck even if you are not currently using it. Stains and sealers can also help.

  • You can use a pressure washer (on a low setting) to blast away dirt or other stuck debris. Make sure you test this on spare wood first, just in case – you do not want to accidentally damage your deck while trying to clean it with high-pressure water jets.
  • Sealers are clear coatings that can stop water from penetrating your deck’s boards – it does not protect from sunlight and UV rays, but it can repel moisture very well.
  • A stain offers both moisture and UV protection and also lasts a lot longer. However, it is harder to apply correctly and can cost a lot more to refresh, meaning that it might be a costly choice in the short term.

What To Consider When Buying an Old House

Old houses have a lot to offer – charm, unique exterior designs and interior layouts, one-of-a-kind histories – but they can also have a lot of issues. Whether they have been updated to a modern standard or not, you still need to be aware of what you are actually buying.

Sometimes it is the small things that can quickly begin to add up, forcing you to make minor changes on a wide scale across the entire home. In other cases, though, there is just one big element that you have to deal with, especially if you want to turn that old house into a modern-day home.

Plumbing Issues

If there is one part of an old house that can decay or break quite easily, its the plumbing. A lot of older plumbing systems are going to be made with less-than-ideal parts, including some that might be made with actual lead piping – which has a chance of leaking lead into your water supply.

Eagle Dumpster Rental makes it easy to rent a dumpster in Allison Park, Pennsylvania and Hampton Township.

However, on a more basic level, you are very likely to end up with a few plumbing problems that need fixing. The problem is, fixing that system will usually still leave you with a sub-standard system, meaning that you will have to make major changes to reach normal standards anyway.

Energy Problems

On top of plumbing, there is the fact that your home may not be properly set up for efficient energy use. Older lights, outdated mechanical equipment, and general flaws in the wiring can sometimes mean that an older house will run up a higher-than-normal electricity bill.

While replacing a lot of your electrical devices and lighting options can seem expensive, you will save a lot more on electricity. You also need to consider the fact that outdated electrical systems can sometimes risk sparking fires and may simply not be compatible with some modern devices.

It is not hard to throw parts of your old electrical system away. You can always use a dumpster rental, like one from the Eagle Dumpster Rental company, to quickly dispose of large items and appliances on your own terms.

Heating and Insulation

Heating an old home usually is not hard, although it might lack features like under-floor heating. The more important part of your heating concerns how well your home will retain that heat: a lot of houses are likely to have flaws like single-pane glass, drafts, or even windows that do not fully close.

All of this can contribute to much less efficient heating, as well as a far higher cost to actually heat your home in the first place. Older heating appliances are also likely to have their own faults, as well as inefficiencies that make them a lot less useful than their modern counterparts.

Dangerous Air

While it might sound like an exaggeration at first, there are many cases where an older house may have used materials that it probably should not have. While this depends on the age and design of the house, it is possible to encounter threats like carbon monoxide leaks in your own home.

Repairing these is not always as easy as it sounds, but there are a lot of easy ways to set up detectors so that you can find the source of the problem. It is a good idea to test your new home before you move in, just in case you happen to be at any risk while sleeping there overnight.

Harmful Materials

Air quality and safety is not the only health concern. A lot of older homes were created using materials like asbestos or lead-based paint, both of which can be seriously dangerous if you are not prepared for it. Often, professional removal is the only safe option for clearing it out completely.

Identifying the presence of materials like this will not always be easy to the untrained eye, but there are ways that you can test or check a home before moving in. Like the air contaminants, it is important to verify whether or not you are dealing with a threat before you spend the night there.

If you are getting rid of some of the materials yourself, then you should use a rented dumpster to hold all of it. This saves you from having to transport it in your own vehicle, avoiding any health risks in the process.

Deterioration

In some extreme cases, an older house may have obvious signs of deterioration. This could be something as small as a single wooden failing on the outside of the house or as large as a major section of the roof. Fixing these issues will depend on the exact nature of the problem.

If you notice anything that shows obvious signs of decay or damage, then it is often a good idea to try and approach the problem directly. Make sure that you handle any repairs as quickly as possible, and call in professionals if you are not sure how to proceed with fixing those dangers or faults.

Foundation Problems

There is an ever-present risk of an older home having serious foundation issues that can cost a lot to fix. If this happens, then you do not really have any alternative besides fixing them – even a small amount of foundation damage can get worse if left unchecked.

Foundation faults are one of the problems that require an expert overseeing since it can be almost impossible to judge the amount of damage on your own. The cause of the damage can also become a major concern if it is likely to keep happening, so you need to be prepared for that risk too.


Handling Dumpsters and Disposal In Winter

A dumpster is a versatile tool that can fit into a lot of different projects, but many people underestimate how important they can become when winter rolls around. Whether you are clearing out furniture or renovating your home, having a dumpster makes everything much easier.

Unfortunately, it can also become slightly harder to use them thanks to the cold – unless you are prepared. Whatever project you are planning to take on, here are some things to consider if you will be using a dumpster in the winter.

Clear the Work Area

It is always a good idea to ensure that you are keeping your main ‘work area’ clear at all times. Snow can often pile up against walls or other surfaces, which might include your dumpster or the side of your house, and it could even bury debris that you were planning to pick up later on.

Shoveling away excess snow is always a good step to take, especially if your local weather reports indicate that you will be getting more snow every night. If you do not keep enough space clear, then it can become increasingly hard to get everything done as the snow keeps falling.

We offer efficient C&D dumpsters of all sizes and volumes to serve your needs in Alverton and area.

In extreme cases, there could even be so much snow that you can’t reach the dumpster properly. You might be able to wade through a thick build-up on your own, but that becomes a lot less likely if you are carrying a heavy bit of furniture or a box of damaged bricks and scrap materials.

Clear Away Ice

One of the biggest challenges with any dumpster is actually getting items into it. While it is easy to throw away a bag full of hedge trimmings or spare pieces of wood, it becomes a lot harder to carry entire items of furniture through an area that is covered in ice and snow.

De-icing is extremely important when you are taking on any outdoor project since you never know how much danger you could be in. If you fall over while you are carrying something heavy, you could seriously injure yourself, and even minor falls can hurt enough to kill your motivation.

Your feet are not the only thing that can struggle to cross ice safely. Even if you clear a path to the dumpster with rock salt, you will probably still want an open, ice-free space for it to be collected later on. This is especially true for tight spaces where the collection truck needs to make precise turns.

Add Weather Protection

Rain and snow are not just a problem on the ground but can also cause issues with your dumpster itself. Since most dumpster rentals operate on a set weight limit, you want to avoid any excess weight where possible, and water is one of the most common issues you are likely to face.

While it might not seem like much at first, even a small amount of water in a dumpster can add quite a lot to the total weight, increasing the chances of you getting fines. Snow is lighter, but it can still contribute to your dumpster’s weight limits when it starts to melt or if it falls in large amounts.

Adding a tarp or some other kind of covering (or, if it has a lid already, closing it) can be a simple fix to this problem. This also has the added benefit of making sure that random people are not throwing away their unwanted items in your dumpster, potentially pushing it just over the maximum limit.

Prevent Freezing

If you are closing your dumpster lid, then you need to keep an eye out for freezing issues. In extreme cold, it is not uncommon to see latches, fasteners, or hinges freezing solid, which can make it incredibly hard to open up a dumpster if the lid is already quite heavy.

This often means that you will need a lot more force to push them open, but this can also increase the chance of you injuring yourself if your hands slip. In even the best of circumstances, a frozen dumpster latch can be an annoyance that you have to deal with daily.

There is not always an easy way to prevent this freezing, but you can still try to get rid of the ice directly before trying to open it. If you are carrying a heavy sack of construction debris, the last thing you want is to struggle against a lock or latch that will not budge.

Plan For Inconsistent Weather

You never know when winter might bring sudden changes in weather, both for the better and for the worse. It is easy to end up snowed in without much time to prepare or suddenly having no snow to worry about despite it still being cold. Planning ahead is not always easy, thanks to these changes.

The best way to avoid getting caught by sudden weather changes is to expect them. For example, you do not want to plan everything down to the exact minute: if the dumpster pick-up deadline is coming, give yourself more time than you actually need to finish disposing of everything.

You never know if you will suddenly be caught up in a bad snowstorm or end up having to take a detour on the way home, completely changing your plans with how much you’re actually throwing away. On the other hand, a dumpster pick-up could come hours later than anticipated.

Planning for the right company is important, too. Groups like Eagle Dumpster Rental might operate in your local area, meaning that they will have a better awareness of the incoming weather compared to a more widespread company that operates from a less-than-local location.


House Flipping: 8 Top Tips for Beginners

House flipping can be an amazing way to make a profit, but it is not as simple as you might expect if your previous knowledge of it all comes from TV shows. House flipping takes a lot of work and investment, and there is a lot of planning you will need to do before you can start on such a big project.

Below, you will find our top tips for house flipping, ideal for anyone who is thinking about trying this but has not yet done the research. With some expert guidance, you can set yourself up for success much more reliably.

1: Budget Carefully

One of the biggest mistakes that novice house flippers often make is to budget poorly, which can eat into profits enormously or even lead to making an overall loss. Fixing up a house to flip it, costs money, and budgeting for all those expenses matters.

The borough of Ambridge is completely within our delivery radius at Eagle Dumpster Rental.

As a general rule, a house should sell for 30% more than it costs you, including repairs. That means that if you reckon a house should sell for $200,000, you should not be spending more than $140,000 in total on the purchase price and repairs. 

2: Understand the Market

Many first-time house flippers make the mistake of failing to research the area their new house is in. If you do not know what comparable houses in the area are selling for, you will not be able to plan your finances properly. In general, fixing up bad houses in good neighborhoods is the best way to make a profit on your investment. Visit the area, get a sense of what it is like, and check the market value of other properties selling in that area.

3: Pay for a Professional Inspection

There is nothing worse than buying a house and discovering a major structural issue that is going to take enormous amounts of time and money to fix. Weak roofs, foundation problems, outdated wiring, and many other problems can strike when you least expect them. It is important to do your research before committing to a purchase of this size, and paying for a professional inspection is the best way to make sure you do not miss any issues that could cause you problems further down the line.

4: Plan your Timeline in Advance

It is important to make sure you give yourself more time than you think you need for a project of this scale. Things are likely to go wrong, and even small delays can add up rapidly, throwing your entire plan off. Plan out how long you think it will take to complete each step of the project, and then add around 25% extra time on top of that for safety!

5: Don’t Do It All Yourself

Do not overstretch yourself. Knowing your limits is an essential part of house flipping, and that means that sometimes you will need to take a step back and call in a professional. Professional contractors are your most important backup for when things go wrong, and it is important to know when to call them in.

6: Plan Your Clean-up In Advance

Building projects and renovations create waste, and you will want to plan out how you are going to get rid of that in advance. If you are on a tight deadline, then you will not want to be panicking about how to dispose of a mountain of trash at the last moment. Hire a dumpster for the entire span of your renovation period, and you can clean up at your own pace, throwing things out as and when you feel the need to clear up. 

7: Don’t get carried away!

If this is your first time flipping a house, it is easy to get a bit over-excited and improve the house too much. Be strategic and analytical about your modifications here – you are not going to be living in this space yourself, so focus on practical and necessary improvements rather than on expensive luxuries. If all the houses in the area only have basic kitchens, for example, it probably will not be worth shelling out for marble counters and high-end fittings!

8: Focus on Selling

You are looking to sell your flipped house, and the longer it spends sitting on the market, the more it will cost you in simple maintenance expenses. This means that you need to stay focused on selling at every stage, doing whatever you can to ensure that the house sells as quickly as possible. 

Price the house to sell. That is the single most important thing. Beyond that, though, there are a few other things you can do to help your house sell quickly. Potential buyers are going to want to be able to imagine themselves living in the house, so keep it clean and minimalist, with minimal clutter and distraction. Painting in neutral colors is a good way to keep things understated and simple, and the more you can do to keep it clean and simple, the better!

Conclusion

House flipping can be a complex and involved process, but doing a bit of research and prep before you get started can help you to avoid a huge range of problems further down the line. Plan everything out in advance, and get as much advice and guidance as you can from more experienced house flippers, and you will be well on your way to success. House flipping does not have to be as scary as it looks, as long as you make sure you are prepared well in advance!

How to Take Down Your Kitchen Cabinets

Kitchen cabinets can be quite tough to get rid of once they are installed. Whether you want to take them down to paint a wall, plan to replace them with something else, or just want to be rid of them entirely, actually removing them can be tricky if you are not used to it.

Here are some things to keep in mind before you try to brute-force the cabinets down, especially raised cabinets that are built into the wall.

Attachment Types

Not all cabinets use the same system to attach them to surfaces. The two most notable are the prefabricated cabinets and the older unitized cabinets, but the differences between them make it important to figure out which is which.

Whether you’re in the heart of Apollo or in neighboring communities like North Apollo, Vandergrift, and North Vandergrift, you can depend on our hardworking, locally-based, family-run company to provide affordable rates on rental dumpsters of all shapes, sizes, and volumes.

Unitized cabinets are often nailed or glued into place, usually using the wall as the back of the cabinet instead of having their own distinct back. These are generally found in older homes that have kept all of the original kitchen furniture, but once you remove them, re-using them is tricky.

Prefabricated cabinets are more recent and generally have their own back, often screwed together so that they are a single unit. They will usually be attached to the wall by screws or some other binding method and can easily be re-used if you break them away from the surface.

Removing the Cabinet

The exact method of removing your cabinet will vary depending on what type you are dealing with. In general, you will want a hammer, a drill, at least one knife that can cut through putty or caulk, other utility knives, and possibly a crowbar or pry bar. Remember safety gear like goggles, too.

Check for any built-in lighting or other important appliances that might be part of the cabinet. You do not want to take it down and accidentally damage something important or break the cabinet entirely. Be sure to clean it out so that it is completely empty before you begin taking it down, too.

Take off the doors

Then, you just need to start removing the extremities first. Doors, shelves, any separate compartments that might be built into the design – remove all of them and set them aside with the screws that were originally in them. If you want to re-use them, you will need to keep all of these screws.

It might help to label things with sticky pads or tape if possible, too. Many cabinets are designed in specific ways that do not allow almost-identical parts to be used interchangeably, and that means that you are limited to keeping the exact same configuration. The same goes for internal shelves.

Removing the bond

Once you are sure you are prepared to start taking them down, choose the most ideal cabinet to start with and begin cutting away the bonding agent or caulk. It is important to cut this away first, even if the cabinet is screwed on since it will minimize damage and risk later.

If you do not want to save the molding, then you can always try to pry it apart by force. This might damage the wall as well, depending on the wall materials, so be prepared to cover it up with something if that happens. Cutting it takes longer but is much easier if you have a sharp knife.

Separating Cabinets

Remember that some cabinets might be connected together, especially newer units. You might have to unscrew cabinets from each other to get them off separately – even if you want them all down, trying to lift them down all at once can be very dangerous.

Older cabinets might not be like this, but make sure you check anyway. You do not want to realize once your cabinet is hanging off by one or two screws that you need to loosen this from inside another cabinet.

Remove it from the wall

Finally, you need to work on the wall itself. Look for the glue, screws, or whatever other mounting systems the cabinet is using and loosen them. Make sure to support the cabinet the entire time, and get ready to lift it away from the wall if it starts to fall down.

If you do not have an extra pair of hands to help out, then it can be tricky to handle this yourself but easy to manage once you get the hang of it. Do not let your cabinet fall since it might splinter or break and become unusable – or damage other things in the kitchen if you are not careful.

Disposal

With the cabinet removed, you need to decide if you are getting rid of the cabinet or keeping it. You might have some that came away cleaner than others, and some might be irreversibly damaged to the point that they are no longer usable as storage.

In this case, it is a good idea to get hold of a dumpster, like some of our excellent dumpster rental offerings. If you are doing large-scale kitchen renovations or furniture replacements, then a dumpster is invaluable for getting rid of furniture without having to carry it all in a car’s limited rear space.

Remember that some cabinets might fall apart when removed from the wall, especially if you took out all of the screws. Older cabinets may rely so heavily on old glue that you can’t put them back together anymore, even if you try gluing them again – so just get rid of them.

With your cabinets down, the hardest part of the process is done. Remember to check the wall and make sure that you did not accidentally damage the surface or leave any screws still in the wall.

Can You Recycle and Reuse Plastic Bottles?

Plastic bottles have always been a strange topic when it comes to recycling. Even though many bottles are being made from recyclable plastics, a lot of people still remember the days where none of them could be recycled, and that association has stuck in their head for years.

Yes, Eagle Dumpster Rental delivers to the community of Armbrust and all of Hempfield Township.

There are a lot of ways to recycle your old bottles, and those that you can’t recycle can be reused. But what can you actually do with them, and how do you tell which is which?

Identifying recyclable bottles

A lot of recycling-friendly plastic bottles will have specific graphics on their label or cap that explain which parts are recyclable. For example, some bottles can be recycled while their caps can’t, and others have particular neckpieces that need to be thrown away normally.

Plastic bottles are one of the biggest contributors to landfill sites and other wasteful disposal options. Some companies may take in non-recyclable bottles to reuse them (and occasionally give you a very small award per bottle), but on their own, they can’t always be recycled.

Reusing them, however, is another matter entirely. There are plenty of ways to reuse bottles that you can’t otherwise recycle, many of which do not even require that much extra work.

Reusing Bottles

If you have a bunch of bottles that can’t be thrown in the recycling, and you do not want to let them go straight to a landfill, then here are some things you can do with them. These are very small-scale projects that do not take much effort, but they can really make a difference.

Storage

A plastic bottle actually makes a great storage option for water, seasoning, salt, sugar, or even nuts and other small food items. While they are often see-through and should thus be kept away from direct sunlight, they allow you to see exactly how much of the contents you have left.

Bottles are also generally airtight – or at least close to airtight – which might make them a useful option for keeping things contained in fridges. Not only does this trap the cold in a little longer, but it means that things will not rot if the freezer breaks or turns off.

It does not have to be food, either. There are a lot of smaller things that you could store in a plastic bottle, from breath mints to nails and other scrap materials. Naturally, water and other liquids work extremely well, too, making it a handy method of storing drinks that you have already opened.

Planters

A plastic bottle can be a great planter option. Cutting them in half gives you the entire bottom half to work with: not only is the material water-tight and resistant to natural corrosion, but most bottles have little legs that raise them up off the ground.

These recycled planters still leave you with the top half of the bottle, but there are other ways to reuse that half specifically. Having these planters gives you an easy way to grow a few extra plants, helping the environment in the long term and reducing your waste.

Watering

Speaking of plants, another common trick is to use bottles as either sprinklers or watering cans. Cutting a few holes in the lid of a bottle makes a nice watering-can-style sprinkle effect, which can be important if you want to get good water coverage without dumping an entire bottle on plants.

However, the sprinkler is the more interesting option. By punching some small holes in a large bottle and plugging a hose into the end, you can spray water in every direction without having to buy your own sprinkler system. Some people even add protruding “funnels” for a wider spread.

Toys

A lot of families that have children will end up with plenty of plastic bottles, whether that is drinks bottles or other substances that they have needed to use to clean up after their child. However, you can always consider washing some of these bottles out and turning them into basic but handmade toys.

This might mean converting two large bottles into a back-mounted “jetpack,” crafting a little spaceship out of a large bottle and two small ones, or even sticking some wheels on a detergent bottle to make your own toy car. They might not be fancy, but they are cheap and fun to play with.

Disposing of bottles

In the event that you have a lot of bottles left over, disposing of them can be tricky. If you have a lot of recycled plastic, it can be tough to actually fit it all into one recycling bin – and you can have the same problem if you are throwing away non-recycled plastic.

If you have an excessive amount of materials to throw away or recycle all at once, then consider hiring one of our dumpsters. Even the smallest options can be suitable for a good amount of recycled material, especially if that includes entire pieces of furniture.

Some people save up their recyclable bottles and then hand them in all at once. However, you might want to consider putting all of your bottles in a dumpster and sending them over together – dumpster rentals do not require you to do anything involving the pick-up process, making it much easier for you.

Remember that most bottles will have their recyclable or non-recyclable status marked on their label. Do not tear the label off a bottle until you have sorted it properly since many can look almost identical without their label, even if one is not recyclable and another one is.


Creating Sustainable College Spaces

Colleges are a major part of the education world, but they also have more freedom in terms of their design than most other schools. A college can have all kinds of creative structures and ingenious quirks that make them unique, and sustainability is one of them.

But how are sustainable college spaces made, and what kind of systems do some of them use to help keep their waste low?

Colorado State University

Colorado State University aims to be as green as possible, with a huge amount of solar power generation being used to regulate building temperatures. This makes the heating almost self-sufficient and massively reduces the amount of power that the college is consuming overall.

That means any homeowners, business owners, contractors, renovation companies, demolition teams, and others in and around Avella, Pennsylvania can depend on Eagle Dumpster Rental for cheap dumpster rental rates and transparent prices.

The Colorado State earned a Platinum rating from the Association for the Advancement of Sustainability, and it is not hard to see why. Within the next 10 years, the university is aiming to generate 100% of its own power through renewable energy, mostly solar power.

On top of that, the university keeps waste to a minimum. Only 7% of dining waste goes to a landfill, with the remaining 93% being reused or recycled in a more sustainable way.

Colby College

Colby College has become famous for constantly trying to lower its environmental impact and even achieved full carbon neutrality as early as 2013. A high amount of solar panels and a reliance on biomass means that it has been able to power each building without relying on normal power sources.

It is also worth noting the college itself is very green, with a lot of open space and well-landscaped areas that use real, healthy grass. Considering that a lot of colleges and universities rely on paved areas, it is a nice change and something that ties into their other eco-friendly projects.

University of Washington

The University of Washington refers to its campus as a “living laboratory” and will give grants to each student that can come up with new methods of reducing environmental impact.  This has led to new creations like green walls and floodplain restoration options, all of which benefit the environment.

The university also allows a lot of field research into specific environmental-related things, including niche topics like aquatic science. Beyond this, a large part of the university is grassy and filled with trees, giving students a natural space to enjoy at their leisure.

University of Connecticut

The University of Connecticut is not just a haven of healthy and happy trees but also uses 23 LEED-certified buildings that use as little power as possible to operate efficiently. However, the more important part of how the university operates is the systems and initiatives it hosts.

For example, there are regular calls to collect bottles and cans from sporting events, a charity donation system that is meant to help students get rid of unwanted items without throwing them away, and even a monthly competition to see which dorm uses the least water and power.


Appalachian State University

Appalachian State University has a huge amount of plant life surrounding it, as well as unique programs that allow students to start compositing unwanted food scraps and waste at their own halls. Parking also has an optional carbon offset for each semester.

Certain spaces in the university are Zero Waste Zones, which help divert waste away from landfills. It also has one of the most notable renewable energy facilities in the entire state, producing at least 800,000 kW hours of power each year.

Creating a Sustainable Space at Home

If you have been inspired by any of the colleges, businesses, or communities that you have seen creating green spaces, then it might be tempting to create your own. It is a lot easier than it might sound, but it can take a while to reach a place of true self-sufficiency.

Still, it is important to take that first step. You do not have to rush to install solar panels immediately – there can be plenty of ways to make your home or business more sustainable with only slight tweaks and alterations.

Outdoor Areas

Keeping an outdoor space natural does not just save on material but can make a much nicer area with a lot more meaning behind it. These areas can also be used in numerous ways and are not tied to a single purpose, which can make them more useful than creating a specific space.

Landscaping an area into something more eco-friendly and attractive can seem hard, but with the right tools (or contractors), you do not have to do much work at all. Consider renting one of our dumpsters if you need a convenient disposal method for dug-up dirt and old, dead plants.

Reduced Waste

Reducing your waste output is always important if you want to make a sustainable space. While this can be tough at first, even cutting down your personal waste production by 7% or less can have an impact in the long run.

Not only that, but it can make you feel a lot better if you are conscious of how much you are wasting. Even some small changes each day can make a huge difference to your mood.

What Now?

If you are considering a big project to overhaul your home or property into something more sustainable, then do not forget to hire the right tools. 

Our dumpster rentals can be an extremely important part of the process, no matter what kind of scale you are working at. Being able to dispose of the dirt and recyclable materials hassle-free makes everything much easier for you to handle.

Remove Before You Move

Moving house is an exciting time, but it can also cause a lot of stress. One of the most time-consuming aspects of moving home is packing and unpacking your belongings. We recommend that ahead of moving house, you declutter and remove items you do not want or need. Doing this before you move will make moving quicker, easier, and in the case of using a removal company can also save you money.

Where to Start?

When trying to remove clutter from your life, it can also be difficult to know where to start. We recommend you look at the space you are moving into. Ask yourself the following questions: 

  • Who am I moving in with?
  • What is the size of the property I am moving into?
  • Will I need this once I have moved?

Then as you remove certain items, you can get into further questions:

  • Do I use this item? 
  • Where will it go in the new house?
  • Do I have space for it?
  • Do I want to keep it for sentimental reasons?

Working through this list in order is a great way to start. Some items you will be able to look at and instantly know whether or not you want to keep that item. We recommend trying not to be too sentimental and do not keep more than you need. 

We’re your local trash hauling specialists serving Avonmore and Westmoreland County, Pennsylvania.

If you are moving in with someone, it is beneficial to see what you each have that is the same and decide which of each item will be coming with you then remove the other. 

Step Two: Start to remove

Once you have your list of questions about the items, we recommend a measured approach to keep your decluttering and packing orderly. A good way to keep things orderly is to work through your current home room by room and clear as you go. You can then pack items you will not need before you move to make more space and you will have a clearer picture of what you own.

Clearing room by room is a relatively simple process to go through, just pick your starting point in each room and work clockwise from there. By the time you have finished decluttering each room, you can turn the circle again and be motivated by your progress. 

Top Items to Remove in Each Room

Make a start with your essential rooms – this will help if you pack early and do not need something in the weeks before you move, it will help to answer the question of if you need the item. 

Starting with the kitchen, we recommend beginning to remove anything that is looking worn. You are moving into a nice, new kitchen do not take your worn items with you. Start with those chipped plates, bowls, and cups. A new dinner set could be on your horizon but for now, make sure you are not moving broken items from one house to another. Mismatched cutlery is another easy thing to remove from your home. That one random spoon you brought home from the office and put in the drawer does not need to move into your new home. 

Next, go through your baking trays, pots, and pans. Are they looking worn? Do they have stains you know you will never be able to remove? If the answer to either is yes, we recommend you decide if you can afford to buy new ones to go into your new home. 

Moving to your lounge, we advise you to look at the specific items in your current room and visualize if they will fit into your new home. Are you planning to change the color scheme, and can you remove accessories that will no longer match the new décor? Has the sideboard become cluttered, and will it take days to pack up? If the answer is yes to either of these, make them your starting point. 

We are not asking you to remove or declutter everything you own, but if items have been in a cupboard since you moved into your current home and have not seen the light of day, it might be time to not take them to your new home. 

Next stop, the bathroom. The first thing to do here is to look at those toiletries. Do you have a half-open bottle of something in the back of your cupboard that you do not remember ever seeing or using in your life? Move that straight to the trash. We get a lot of toiletry gift sets throughout the year, and there are always those items that we know we are never going to use that just go in a drawer. There is no obligation to move them with you, if they are unopened, you can donate them. 

Take this time to go through your towel and washcloths too. If they are starting to look ragged, time to put them in the trash too. 

Finally, the bedroom and this one may be a little more tricky, as with your kitchen, pick a starting point and work your way around the room. This is a great time to go through your closet and get rid of those clothes you have been keeping but never worn. 

I’ve Decided What to Remove, Now What?

You are feeling accomplished, and every room has a pile of items you no longer need, now you need to get them out of the house. The best way to do this is to look at the condition of each item. If it is in good condition, you can donate the item, or you can also put it on a local or national selling site to help pay for replacement items for your new home. However, if the item is in bad condition, put it straight into the trashcan.